
Are you wondering how to add a favicon to a Clickfunnels Page? If your answer is YES, then don’t worry because we got you covered. This helpful short guide should be more than enough to help you solve your minor issue and get you on the right path to success with the platform.
A Favicon (“fave-icon”) can be described as a small iconic image that can be seen in the address bar next to the URL of your website. Furthermore, they are displayed next to the name of your website in a user’s list of open browser tabs, which makes it easier for the user to locate your website.
Favicons can have precisely the same design as your website logo or have a significant resemblance to it. Nevertheless, you should make sure that you have an attractive favicon design. After all, the eye is the first thing that sells. Browsers can recognize many image formats, but for favicons, it is recommended to use the one that is recognized by every internet browser, and that is the Microsoft ICO format.
Add Favicon To Clickfunnels Page
The entire procedure is extremely simple, and it can be done in less than five minutes. We’ve divided it into six simple steps to make things more clear. Follow these steps to add the favicon icon to your desired Clickfunnels page:
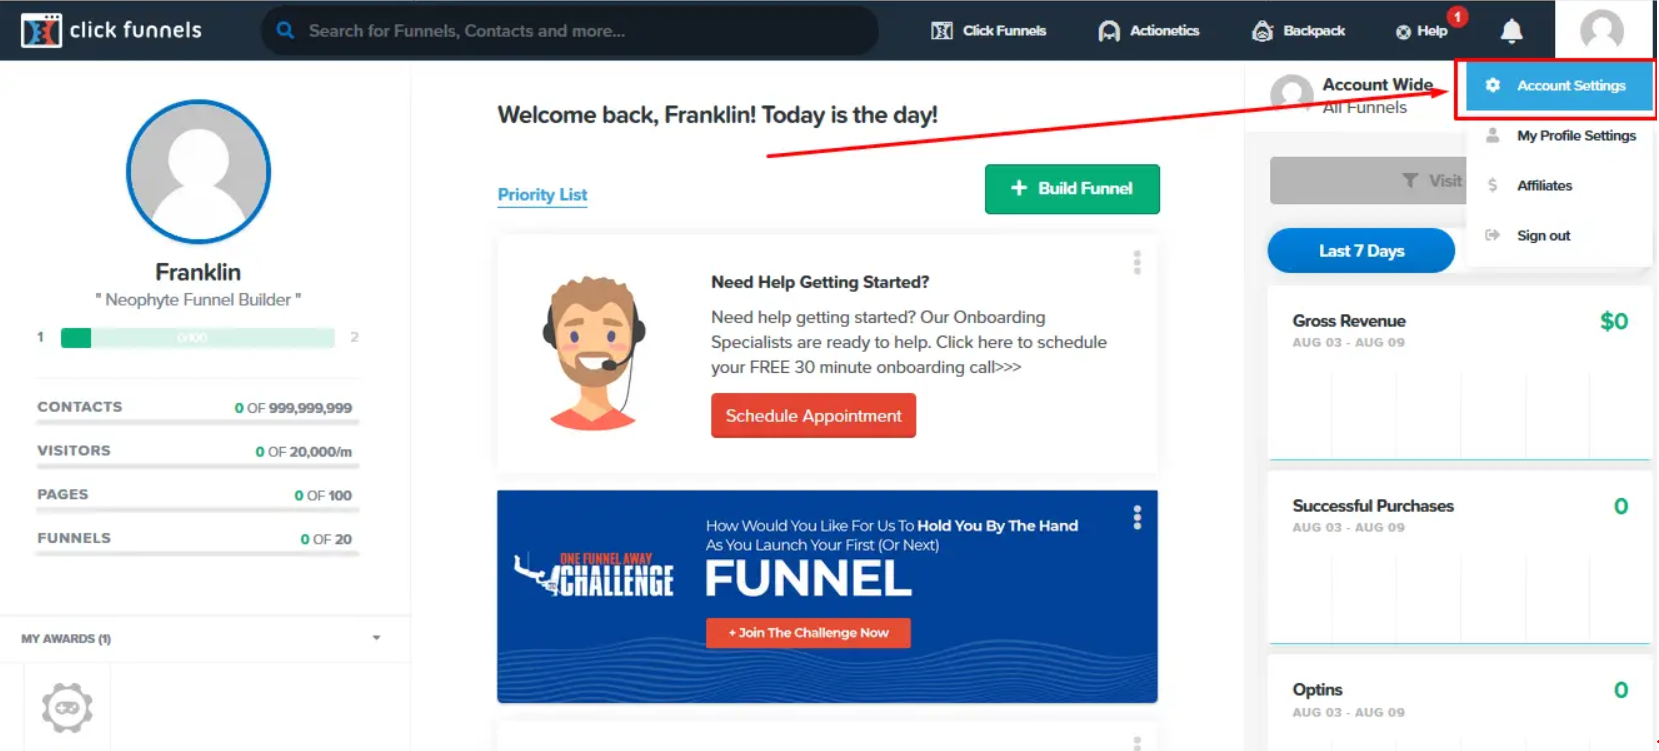
- Step #1: Access your Clickfunnels account and hover over your profile picture to reveal the dropdown menu. Pick the first option that says, “Account Settings.”
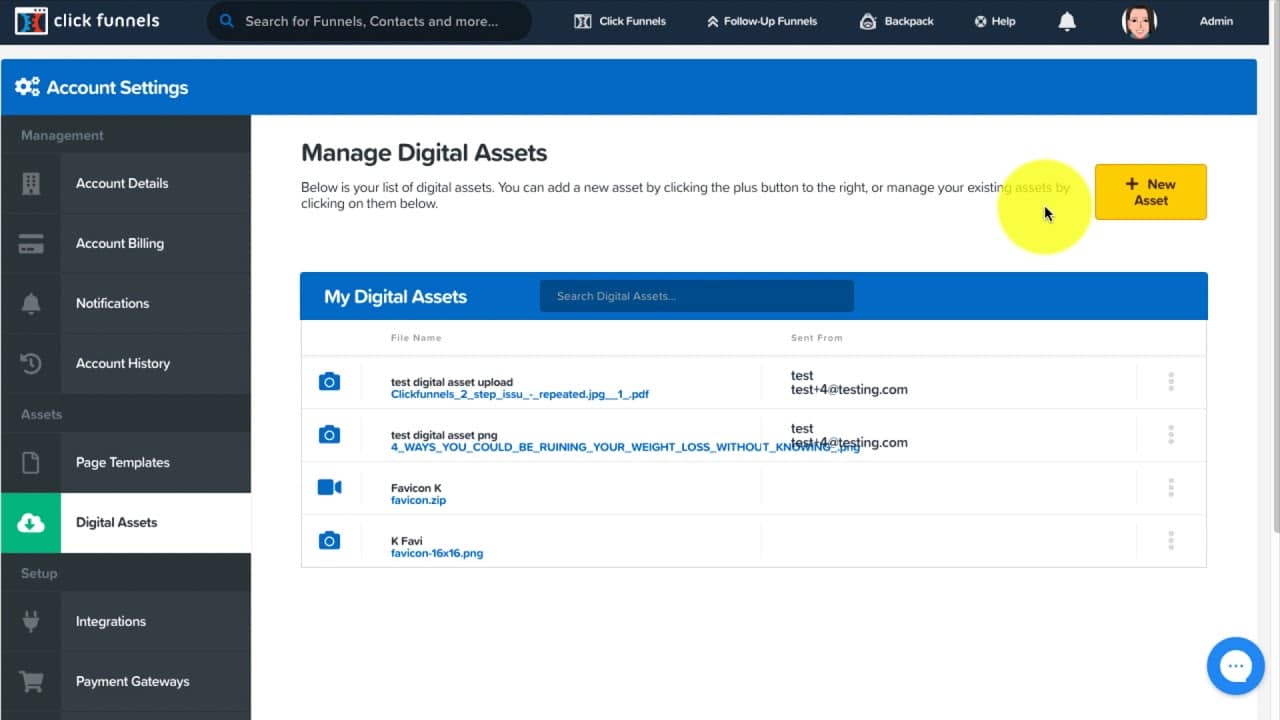
- Step #2: Select “Digital Assets” from the navigation menu on the left. This is the same place you go when you’re uploading images, videos, and other types of files to your Clickfunnels site. Once there, click on the yellow “Add New Asset” button located at the top right corner of your screen.
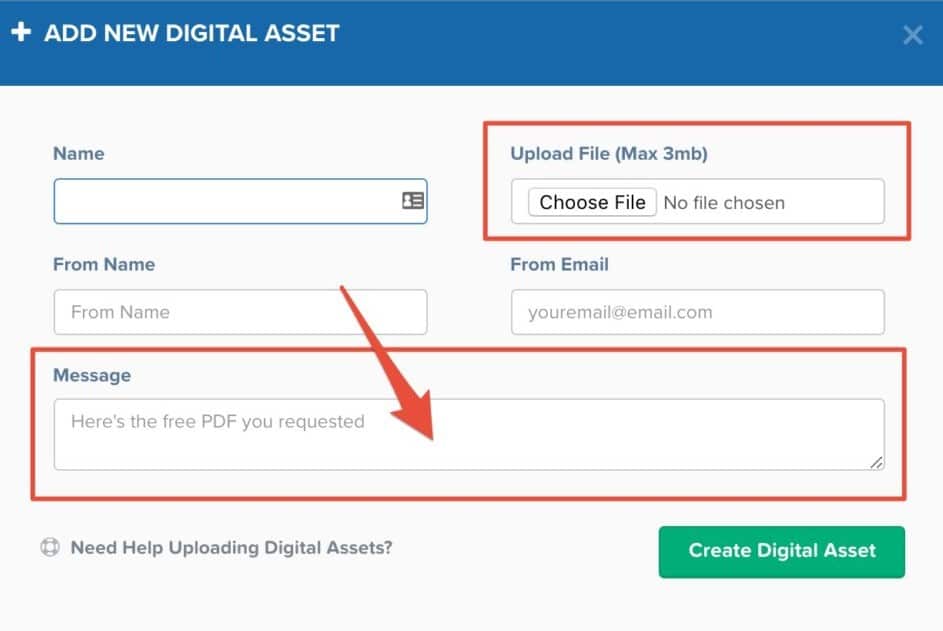
- Step #3: Click on the “Choose File” button and upload the file (favicon ICO) that you wish to use. Next, you will need to name your file. Our recommendation is to pick a generic name, something like “Favicon.” Once you’ve named your file, click on the green “Create Digital Asset” button.
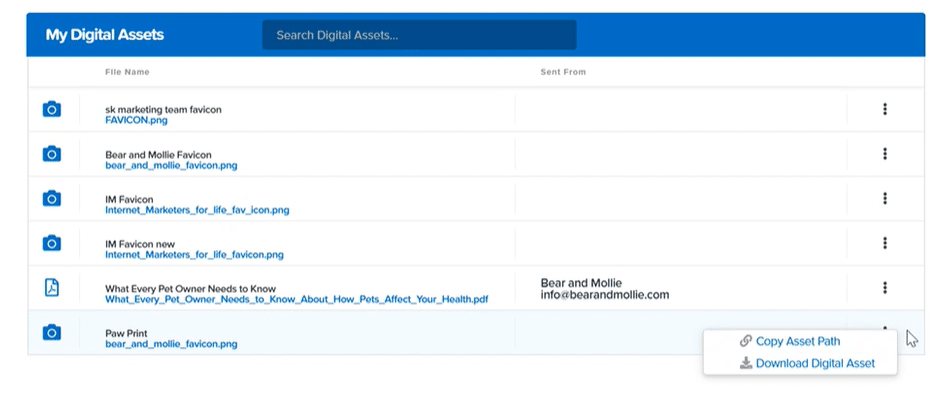
- Step #4: Browse the entire list of digital assets until you find the file that you have just uploaded. Once found, click on the three dots and choose the first options that say “Copy Asset Path.” Keep the code safe because you will need it to finish the procedure.
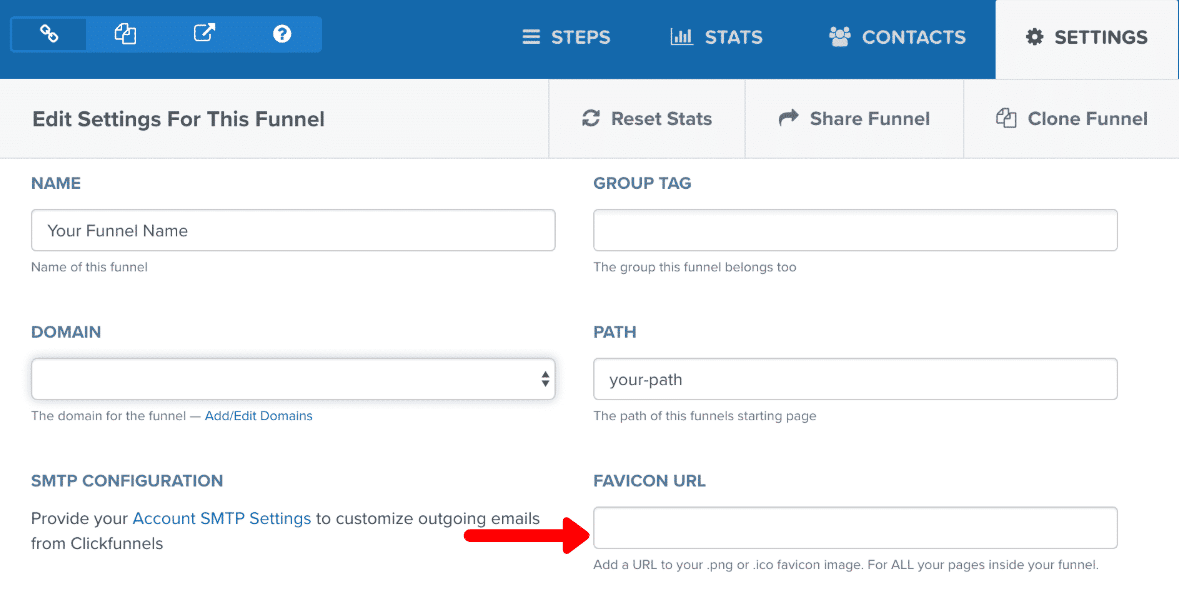
- Step #5: Find the page that you wish to add the favicon icon and select the “Setting” tab located at the top right corner. Paste the code that you previously copied into the “Favicon URL” field. Once you’ve pasted the code, click “Save,” and the favicon will be added to your sales page.
You have now successfully added a favicon to your Clickfunnels page.
Please don’t stress if the favicon doesn’t show up right away. It may pop-up straight away, but it may take some time as well. Uploading a favicon may seem like an unimportant task but is quite beneficial because it gives a more professional representation of your brand. It helps users recognize your brand much faster and easier. Favicons improve user experience by assisting users to identify your site when they have 100’s of bookmarks or even open tabs. They might be a small detail, but our recommendation is always to use them.
Hopefully, this post helped you to set everything up in your Clickfunnels account and made things easier for you. If you ever feel like you’re stuck and need help feel free to visit DeeFunnels where we’ll be glad to help you in any way possible. We wish you success and good luck in your online journey.

